Calcium Reactor Setup
After receiving multiple requests from fellow hobbyists to walk them through setting up a calcium reactor, I’ve decided to make a step-by-step guide on setting one up for their reef aquarium.
To start, you must determine the size reactor you will need. The average calcium reactor is rated for aquariums about 200-250 gallons and moderately stocked. But more hard coral dominated aquariums may need larger reactors. Smaller reactors are available, but the larger reactors are typically used to allow more flexibility.
After the size reactor is determined, begin shopping for the equipment. The reactor itself should be from a recognized manufacturer/vendor, and should be rated for aquariums larger than what you currently have. This will allow you to stock your aquarium more heavily, but also allow you to upgrade to a larger aquarium in the future. When picking out a calcium reactor, look for models that include a bubble counter, a recirculating pump that flows from bottom to top (more effectively uses CO2), and is made of quality material such as acrylic. Also make sure that the top of the reactor is easily removable, making maintenance and replacing of the media an easy task.
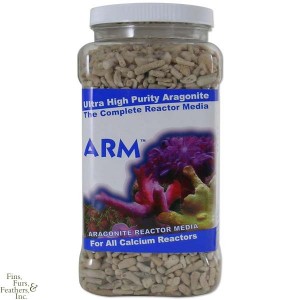
Aragonite Calcium Reactor Media
Image Courtesy of Marine Depot
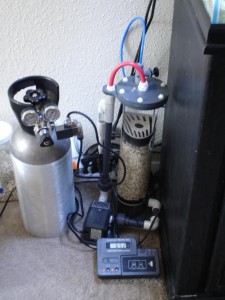
In addition to the calcium reactor, you will need to purchase several other pieces of equipment. A CO2 cylinder, CO2 regulator with a needle valve, pH controller, Calcium Carbonate (CaCO3) media, a small pump to feed aquarium water to the reactor, and CO2 resistant tubing are all required pieces needed to complete your calcium reactor setup. The CO2 tank is an aluminum cylinder that houses CO2 under pressure. The CO2 regulator attaches to the aluminum tank and performs two functions. It monitors the available CO2 in the cylinder and delivers CO2 to the calcium reactor via the precise needle valve. The pH controller monitors the pH of the effluent water (water leaving the calcium reactor), allowing you to raise and lower the pH of the effluent water to suite your aquarium’s needs.
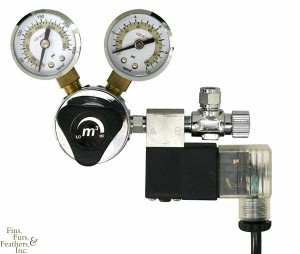
Deluxe Dual Gague CO2 Regulator
Image Courtesy of Marine Depot
Once all of the equipment is purchased it’s time to assemble the calcium reactor setup. Begin by opening up the reactor, pouring in the desired amount of media, assembling the PVC fittings, and reattaching the lid. Next, attach the feed pump and let the calcium reactor fill with water. After the reactor fills with water from the aquarium, and is subsequently pouring effluent water back into the aquarium, start the recirculating pump. At this point in the assembly, check for leaks and fix them. Now it’s time to connect the CO2 equipment. Attach the CO2 regulator to the cylinder and slightly open the knob on the cylinder. Do not open the knob on the cylinder all the way. Just open it a 1/4 turn of the knob. Then as CO2 is flowing into the bubble counter on the calcium reactor, adjust the needle valve on the CO2 regulator and decrease the effluent flow rate. Most calcium reactor manufacturers have desired guidelines, but I like to start it out the pH a little higher, the bubble count a little lower, and the effluent flow a little slower. This will prevent alkalinity from climbing too high too fast and pH from dropping too far. But as a general guideline, set the effluent water flow to 40 drips per minute with 10 bubbles per minute of CO2. Then, adjust the pH (via the controller) to approximately 6.5 to 6.7.
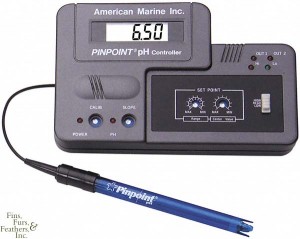
pH Controller
Image Courtesy of Marine Depot
Once the reactor is running, it’s time to fine tune. Adjust the bubble rate, effluent flow, and pH of the setup in order to optimize your CO2 use and aquarium pH. Be sure to test your water for pH and alkalinity, as these two are the most crucial to the chemical balance at this stage. Let the calcium reactor run for about 24 hours, then retest your parameters. The alkalinity should have increased, but it should be under 12 dKH. If it is too high, decrease the CO2 input and increase the pH of the effluent water. Continue adjusting until you reach stable levels of pH and alkalinity, and your calcium isn’t decreasing or increasing. Also keep in mind that the calcium reactor is not designed to increase your calcium level in your aquarium, but maintain it. So don’t worry if your calcium levels aren’t increasing. To raise your calcium levels, I recommend dosing with a liquid calcium supplement until you reach the desired calcium levels.
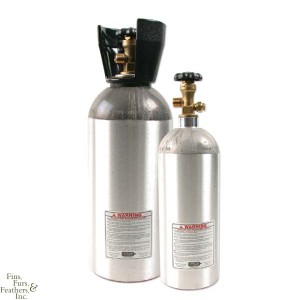
CO2 Cylinder
Image Courtesy of Marine Depot
This is hopefully a fairly thorough calcium reactor setup guide. If you have any questions, feel free to email me at admin@aquanerd.com and I’ll respond as quickly as I can.


