Moving is a stressful event. You have to pack up all of your belongings into cardboard boxes, arrange for movers to transport your furniture and other belongings, worry about items getting damaged, and spend the following weeks getting settled in your new place. Ask any reef aquarium hobbyist about moving and he or she might paint a much darker picture. Instead of only worrying about furniture getting scratched, the aquarist must also worry about potentially losing thousands of dollars invested in livestock. Additionally, the reef keeper must dedicate a vast amount of time to making sure the aquarium not only gets moved safely, but gets completely reestablished. Reestablishing the aquarium is the hardest part of the process as it involves keeping water quality within an acceptable range to keep the livestock alive. Ammonia and other harmful nutrients will build up in the water due to disturbing the sand and rocks, which have built up a lot of harmful substances and trapped a lot of detritus over the years. The presence of these nutrients will further stress out the already stressed livestock, which can lead to livestock death. Despite all of this, there are several things you can do to make the transition an easy one.
Continue reading below…
The first step of moving an established reef aquarium is to plan, gather supplies, and prepare in advance for the move. Determine a time of the day, preferably when it is not too hot, make a list of things to do, purchase or borrow several holding containers to transport water and livestock in, rent glass suction cups and a furniture dolly to move the aquarium (works great for larger aquariums), and make extra saltwater to keep on standby. It is important to note that whatever containers you use must be clean. Bleach and other household chemicals will quickly kill any livestock it comes in contact with. In addition to all of the equipment required to break down the aquarium, help will be needed to move the tank. Aquariums can be very heavy. A standard 90-gallon aquarium can exceed 135 lbs by itself, and it takes at least two people to carry that much weight safely. One last preparation you can consider is to sell as much livestock as possible, or at least find a friend to house it for you. Finding a friend with an established tank to house your livestock would be ideal, as it would give you plenty of time to get your aquarium back up and running at its new location. The water could then cycle and stabilize before you had to add the livestock back to the tank. However, the luxury of selling everything prior to the move is not always available, or desirable, to the aquarist and must be dealt with during the tank move.
After the initial plan and supplies are gathered, the physical process of breaking down and moving the aquarium can begin. Start by turning off all of the aquarium’s lights and pumps, and remove any equipment that will impede the aquarium breakdown. Then begin siphoning out the sand in both the aquarium and the sump, if present. Be careful as you do this though, as the rock work might begin to shift or fall over. Remove as much of the sand as possible, as siphoning is the absolute easiest method of removal. After you have removed most of the sand, begin filling the remaining containers with the remaining water in the aquarium. It is important to save as much water as you can because it will be required to fill the aquarium back up once it is in the new location. When the water level drops low enough to expose some of the corals to air, begin removing the live rock and corals. I find it very useful to use a large ice chest to place the coral covered rocks into. This is due to the ice chest’s size and shape. One can easily fit a large amount of corals and rock into the ice chest, cover it all with water, and carry it out using the provided handles.
Continue removing the live rock, double-checking the larger pieces to make sure no fish have hitched a ride into the container. This is important to prevent fish from getting crushed during the trip to your new location. Once all of the live rock and most of the water has been removed, begin netting out the fish and placing them into a container with aquarium water. I prefer to house the fish and invertebrates in a container by themselves. While the livestock is in the containers, you should add a battery operated air pump with an air stone to oxygenate the water and keep the pH from falling too far.
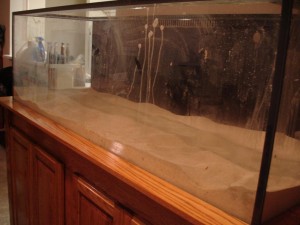
Once all of the livestock, sand, and live rock have been removed from the aquarium, the equipment can be broken down and moved to a vehicle for transport. Start by removing pumps, powerheads, and any other easily accessible equipment. Remove any remaining equipment and, with some help, begin removing the aquarium itself. Large commercial suction cups work wonders for a tank move. Simply attach on to each end of the empty aquarium, pump the handle to create the vacuum, and pick the aquarium up. When moving the aquarium, move slowly and methodically. Lift it in one fluid motion and set it down on a furniture dolly, if you have one. Otherwise, slowly walk to the transport vehicle making sure not to bump any doorways, walls, or doorknobs. Once on the vehicle, be sure to secure all loose aquarium equipment so that they do not get damaged or damage the tank during transport. Additionally, be sure to drive carefully and take turns slowly to prevent buckets from spilling or falling over. It might also be wise to predetermine the route you travel. The quickest route might be the roughest on the equipment or livestock, so pick one with better road conditions or fewer turns.
Once you arrive at the new location, immediately take the livestock inside. This will prevent them from getting too hot or cold while sitting outside or in the back of a vehicle. Double-check the battery operated air pumps to make sure they are still functioning, add a heater if the water is too cold, and dim or turn off the lights. The goal is to make the livestock as comfortable as possible during this transition phase. Once the livestock is indoors, you can take your time moving the equipment.
To begin moving the tank into its new home, you must first determine where the aquarium will be placed. Once selected, move the stand and sump into the new location, followed by the tank. Hook up all of the plumbing and get the system ready for the livestock. Place the live rock that does not have any coral on it, back into the aquarium. After the base rock is arranged in an appropriate layout, add the sand. The reason for adding sand after the base rock is to create a solid foundation. The rock will sit directly on the glass and will not shift if sand gets removed by water flow or hiding livestock. After the sand is in place, begin pouring the saltwater you saved into the tank. Continue filling up the tank until all of the water is in the tank and turn on the powerheads. Do not put the livestock into the tank yet, as detritus trapped in the sand has already begun to break down and the already stressed livestock will not be able to handle it.
Instead, at this point of reassembly, I like to go a less frequently traveled route. I use a product that helps neutralize the ammonia and jump-starts the aquarium cycle. My products of choice are Bio Digest and STOP Ammo by Prodibio, though there are several other products on the market that perform the same function. According to Prodibio, STOP Ammo is made from desert plant extracts and neutralizes ammonia by using glyco-compounds, which bind and store the ammonia in a non-toxic form and synthesize it into protein and amino acid-based foods. Bio Digest is a source of nitrifying bacteria, which will jump start the cycle in the reestablished aquarium. The end results of adding these products to the water are an immediate reduction of ammonia, a reduction of harmful nitrites, a more stable and less stressful environment for fish and invertebrates, and few lost fish during their transition back into the aquarium. The STOP Ammo and Bio Digest come in packages of small glass vials. One glass ampoule will treat 60 liters, or approximately 16 gallons of saltwater. To dose, simply break the vial and pour the contents into the aquarium, being careful not to cut yourself with the glass. Finish assembling your aquarium and turn on the aquarium’s filtration. At this point, I would also dose the containers housing the livestock with an appropriate amount of STOP Ammo or other ammonia-neutralizing product. Then, I would just let everything sit. The livestock can wait in the containers for several hours as long as the battery-powered air pumps are functioning.
After the aquarium has been filtered and the cloudiness has subsided, I would start to put the livestock back into the aquarium. It will take several hours before the tank is ready for livestock, and it may even have to wait until the following day, but patience is very important during this step. Run the protein skimmer, filter socks, carbon, and any other filtration device available to you to help clear the water and further neutralize any harmful organic compounds in the aquarium. One last thing to do prior to adding livestock is to actually test the water quality. Perform a few simple tests on ammonia, nitrite, and pH if you have them. If, for whatever reason, ammonia, nitrite, or pH are not at acceptable levels, try to correct them with a water change if you have the extra water on hand. If not, just wait a little longer for the tank to stabilize, then retest. Once everything tests out to be acceptable, begin the process of adding the corals and rest of the livestock.
With the aquarium lights still off and the ambient lighting dimmed, start removing the coral covered live rock from their containers and begin placing them into the tank. As you pull the rock from the container, be sure to shake it around a little bit to remove any leftover detritus in the cracks and crevices of the rock. This will, to some extent, prevent further nutrient build up in your aquarium. As you place the rock into the tank, do not focus much on aquascaping, as it can be done later. For now, just focus on getting the coral into the tank. At some point during the rock adding process, you may have to siphon out excess water so as to not overflow the aquarium.
Once all of the corals and live rock are in the aquarium, begin aquascaping and get things the way you want them. After settling on a favorable layout for the live rock, begin adding the fish and other invertebrates to the tank. Start with the invertebrates and hardier fish and watch how they react to being introduced to the aquarium. If the livestock is reacting normally, continue to add fish or invertebrates one at a time until all are in the tank. Once everything is in the aquarium, I would begin to prepare for a water change. The water change will prevent harmful ammonia or nitrite from building up and killing your livestock as the aquarium reestablishes its nitrogen cycle and tries to stabilize. While a new batch of saltwater is being prepared, continue to dose STOP Ammo or other ammonia-neutralizing additive per the manufacturer’s instructions to further prevent an ammonia spike. Wait a day or two until your water is fully mixed, perform the water change, and continue to monitor your aquarium’s livestock and begin enjoying the saltwater aquarium hobby once again.


